When the software is first started, there is no plant in Virtual
Bonsai.
Choose a young plant for Virtual Bonsai by clicking the ![]() button.
button.
After choosing a young plant click "open" to bring it into the Virtual Bonsai window.
-From the second time you run the software, the bonsai automatically appears as it was left.
When you want to start growing another bonsai, click the ![]() button and choose another young plant.
button and choose another young plant.
Go to the Top Page of This Manual
The bonsai grows automatically.
In order to change the growth speed, select [Display]-[Environment]-[Other],
then change the growth speed.
A time span of one minute is equivalent to bonsai growth of one
year.
This time span is approximate, as it depends on the type of
tree, the age of the tree and the environment.
Some kinds of tree will go through the following stages: germinating,
growing leaves, turning red, shedding leaves.
If you wish to enjoy a particular stage of your bonsai's development
for a while, click the ![]() button
and stop the growth of the bonsai.
button
and stop the growth of the bonsai.
While the growth is stopped, the ![]() button changes.
button changes.
Click the ![]() button again to
restart the growth.
button again to
restart the growth.
The realistic representation of the veins of a leaf, red leaves, the bark, the shade, etc. is possible only with snapshots.
Go to the Top Page of This Manual
The bonsai grows automatically, but if you leave it alone, it will wither.
When you want to watch the current growth of your bonsai, click
the ![]() button and open the growth window.
button and open the growth window.
The age of the tree, the status of its current growth, water levels, infestation by harmful insects and the size of pot are displayed in this window.
Check the situation carefully and, if there is a problem, take measures to cope with the situation.
Even if you do not open the growth window, you
can see the branches and leaves changing color due to lack of
water or fertilizer, or an outbreak of harmful insects.
Go to the Top Page of This Manual
When you close Virtual Bonsai, you are asked if you want to
save or
not. If you want to save the growth at this time, click the [Yes]
button. If you want to go back to the previous situation because
you made a mistake in pruning or shaping the branches, then click
the [No] button.
When you restart the software, the last saved situation will appear.
If you want to start growing another young plant, you will
also be asked about saving the current situation of the bonsai.
Go to the Top Page of This Manual
When you want to prune any unnecessary branches of the bonsai,
click the ![]() button and the mouse
pointer changes to a pair of scissors.
button and the mouse
pointer changes to a pair of scissors.
When you move the scissors onto the branch, the part of the branch
which will be pruned changes color.
If you left-click on the branch which you want to prune, the branch
will disappear.
If you do not like the result, or have made a mistake, you can
go back to the former situation by clicking [Undo].
If you want to finish pruning, click the ![]() button again.
button again.
Too much pruning can cause the bonsai to wither.
When it is difficult to see the branches because there are a lot
of leaves, open the pop-up window by right-clicking and cancel
the [Rendering Display of Leaves].
Due to the growth process of the bonsai, sometimes you are unable
to click the ![]() button.
button.
Branches which are too thick can not be pruned.
Go to the Top Page of This Manual
When you want to bend the branches of the bonsai for shaping,
click the ![]() button and the
mouse pointer changes to a wire.
button and the
mouse pointer changes to a wire.
The part which will be bent will change color. Select the branch
from within the colored area.
While holding down the left button of the mouse, drag the mouse
in the direction you want to bend.
When the branch is bent, the parent branch also bends.
When you release the left button of the mouse, the shaping of the branch is completed. If you do not like the result, or have made a mistake, you can go back to the former situation by clicking [Undo].
If you want to bend as if you are holding the branch between your
fingers, open the pop-up window by right-clicking and select [Shaping
Branch -Pinching].
The mouse pointer will change to the hands icon.
When you want to finish shaping, click the ![]() button again.
button again.
Too much bending of the branch can break it.
Due to the growth process of the bonsai, sometimes you are unable
to click the ![]() button.
button.
Branches which are too thick can not be shaped.
Go to the Top Page of This Manual
When you want to water the bonsai, click the ![]() button and the mouse pointer changes to a watering pot.
button and the mouse pointer changes to a watering pot.
By holding down the left button of the mouse on the place you want to water, you can keep the water running.
When you release the left button, the water will stop. If you have watered too much, or want to try again, you can go back to the former situation by clicking [Undo].
When you want to finish watering, click the ![]() button again.
button again.
Too much watering can cause the roots to rot.
Go to the Top Page of This Manual
When you want to fertilize the bonsai, click the ![]() button and the mouse pointer changes to a shovel.
button and the mouse pointer changes to a shovel.
Choose one of the fertilizers you have from the fertilizing window.
The result is different depending on the type of fertilizer.
With one left-click a single measure of fertilizer is added to the soil.
If you have fertilized too much, you can go back to the former situation by clicking [Undo].
When you want to finish fertilizing, click the ![]() button again.
button again.
The amount of fertilizer is limited, so it will run out eventually.
Watch the amount indicator on the fertilizing window.
Too much fertilizing can also be the cause of rotten roots.
Go to the Top Page of This Manual
If you do not re-pot the bonsai to a bigger pot when it becomes bigger, its growth may be disturbed and it may wither.
When you want to re-pot the bonsai, click the ![]() button.
button.
For the first step of re-potting, choose the appropriate combination of soils.
After choosing the ratio of the kinds of soil using the slider,
click
[Select Pot].
Choose the pot you would like from the list of pots.
Choose the size of the pot (big, medium or small) using the radio button.
Click [Open], then finish re-potting.
Go to the Top Page of This Manual
Due to the conditions of the bonsai, harmful insects will sometimes appear.
Occasionally you can notice the existence of such pests from the color of the leaves or branches, but sometimes you can not see them.
When the growth of the bonsai is not good, check the [Growth Window].
If the bonsai has been attacked by harmful insects, click the
![]() button and the mouse pointer changes
to a spray.
button and the mouse pointer changes
to a spray.
Choose a suitable pesticide against the insects from those you have available in the pests window.
While holding down the left button of the mouse, spray the chemicals.
If you spray too much, you can go back to the former situation by clicking [Undo].
If you want to finish taking measures against the pests, click
the ![]() button again.
button again.
The amount of the pesticide is limited, and it will run out eventually.
Watch the amount indicator in the pests window.
If the chemical you have sprayed is not suitable, there will be no positive result.
If you spray too much, you will disturb the growth.
If you take measures against the harmful insects earlier, you will consume less of the pesticide.
Check the growth situation regularly.
Go to the Top Page of This Manual
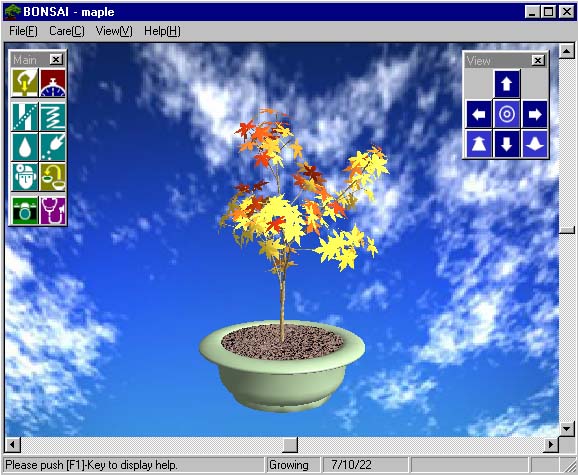
EWhen you want to change the view point of the bonsai, click the appropriate buttons in the view window.
|
|
||
| Looking left |

|
Looking right |
| Zoom in |
|
Zoom out |
When you want to go back to the former position, click the
![]() button.
button.

EWhen you want to look around the bonsai, use the scroll bar.
Go to the Top Page of This Manual
You can take a snapshot of the grown bonsai and save the image.
When you click the ![]() button,
the snapshot window will appear.
button,
the snapshot window will appear.
Choose the size of image, quality and, if you wish, the date for the snapshot.
When you click the shutter button![]() ,
it will start to take a picture of the current frame.
,
it will start to take a picture of the current frame.
While taking the picture, the process will be shown in the snapshot window.
If you want to cancel the process, click the ![]() button.
button.
When the snapshot is completed, the telephone will ring from DPE and the image will be shown in the snapshot window.
When you want to enlarge the snapshot, click the ![]() button and open the enlarge window.
button and open the enlarge window.
You can print the snapshot from the enlarge window.
When you want to save the image, click the ![]() button and type the file name.
button and type the file name.
The file is saved as a BMP file in 24 bit color, so you can use it with other applications.
Because it takes time to make the snapshot, try first with a small size and standard quality image and check the frame before making a bigger and better quality image.
Due to the growth process of the bonsai, sometimes you are
unable to click the ![]() button.
button.
It is possible to output realistic images by ray-tracing the
veins of a
leaf, the red leaves, the bark, the shadow etc.
You can keep only one snapshot image.
In other words, if you do not save a snapshot and take another one, the former snapshot will disappear.
Go to the Top Page of This Manual
You can change the light and background of the screen.
Choose [Display]-[Environment] and open the environment window.
You can select the three-dimensional direction of the light by
making one left-click on the coordinates.
You can change the strength of the light source and ambience
of the
light with the spin button.
When you want to change the color of the light, click the right-hand box to show the color dialog, then use it to change the color to your preference.
The shape of some kinds of bonsai is influenced by the direction and the strength of the light.
You can change the background color and its depth.
If you choose [Background Image], you can use an image file
for the
background.
If you want to use other images (not included in [Virtual Bonsai]),
copy an appropriate image file into the DATA folder in the [Virtual
Bonsai] folder installed on your hard drive
.
Supported Image type: 24 bit full color BMP file.
Background Images can be distorted by the size of the [Virtual Bonsai] window.
Changing the situation here will cause a real-time change to the display.
After deciding, click [OK].
After you have set the image, the display will show the background.
If you want to go back to the former situation, click [Cancel].
If you click [Default setting], it will go back to the setting
when
[Virtual Bonsai] was first installed.
Go to the Top Page of This
Manual
![]()